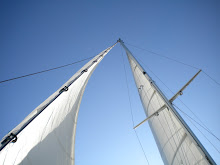
 Given our new paint job, new canvas appears to be in order. Plus the existing canvas is worn just about beyond repair. So the projects have begun!
 First up was the tiller cover, to get get used to the new Sailrite machine and working with the heavy sunbrella fabric. I used the existing cover (shown here) as a template. The only challenge was the pleating to create the soft, padded end of the cover, but even with that this went very quickly.

The next project was to start on the winch covers. I took measurements of the 7 winches, and following (more or less) the instructions from SailRite, I was able to churn out the first two. They went pretty quickly and were not challenging to sew. You can see the old canvas leaning against the piano in the background for color contrast.
My one lesson learned from winch cover one was not to wait until the end to insert the elastic in the internal cap - it is much easier to insert it before sewing the side seam and then attaching the circular top!
With these projects complete, it was time to tackle the main sail cover. I ordered more fabric and materials from SailRite and studied their instructions for a standard cover. After deliberating, I decided to copy the existing cover as I like the customized boom end piece and the fit with the buckles rather than toggles. So on a nice day a couple of weekends ago, I laid out the cover on my fabric, traced the pattern and cut it out.
I should mention that I have been using a hot knife to cut the fabric as this seals the edges and limits the amount of seam finishing needed. I also decided on matching thread rather than the standard white contrasting thread. Peter and I walked the marina, looking at the covers on different boats, and I found I much preferred this look.
Sewing on this very large piece of fabric is challenging. Our boom is about 16 feet, and I've extended the fabric at the end of the pattern to allow me room to do the custom end portion. The existing cover is actually about 7 inches too short for some reason - I suspect it was either custom made and an error was made, or it was accidentally purchased in the wrong length. So I will be fitting that portion on the boom to make sure it is correct. The walking foot on the SailRite machine is wonderful - really helps when dealing with this heavy fabric.

The fitting at the mast went surprisingly smoothly - I put in some heavy nylon lining to withstand the chafing that will happen at this point. And the zipper went in without difficulty. I again followed an alternate method from the SailRite instructions. Instead of sewing the zipper in from the wrong side, then turning and sewing the final seam, I did both seams from the front to make sure the two lines of stitching are parallel. It wasn't difficult to do it this way. I left the bottom of the zipper unfinished, as I want to finish the bottom of the cover, then lay the zipper end over that. So with the mast fitting and zipper complete, I took it to the boat to fit the boom end. It was fun to see it in place, and if I squint just right, I can imagine it as a finished product! Next up - fitting the boom end.


No comments:
Post a Comment